Looking to start creating your own pottery? This article demystifies the process of how to make a pottery piece from the ground up. We will guide you through selecting clay, setting up your workspace, and shaping your vision into a tangible piece of art. With straightforward, actionable advice, you’ll be ready to dive into pottery-making with confidence.
Table of Contents
Key Takeaways
Clay selection is foundational, with options like earthenware for beginners, stoneware for functional pieces, and porcelain for experienced potters.
Setting up a home pottery studio requires planning, essential tools like a wheel and kiln, and precautions like good lighting and ample space for a streamlined workflow.
The pottery-making process involves several steps from wedging clay to rid air bubbles, choosing hand-building or wheel techniques for shaping, and careful drying to bisque and glaze firing for the final transformation.
Discovering the Right Clay Body for Your Project
Selecting the appropriate clay body for your pottery project parallels picking the ideal canvas for a painting. The type of clay you choose forms the foundation of your work and significantly impacts your overall pottery-making experience and the final product. Using your own clay can add a personal touch to your creations.
Pottery clay broadly falls into three categories:
Earthenware clay: absorbent and beginner-friendly
Stoneware clay: robust and perfect for creating functional items like mugs and vases
Porcelain clay: known for its durability, whiteness, and translucency, but molding it effectively requires expertise, often seen in exquisite porcelain pottery.
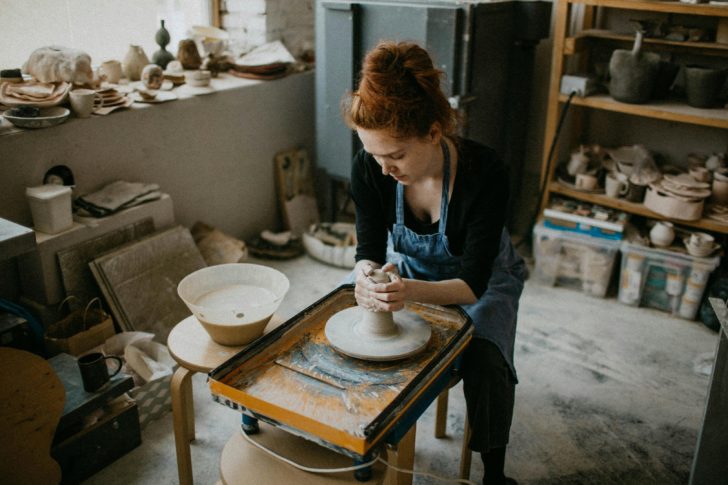
Setting Up Your Pottery Studio Space
Imagine having your own pottery studio at home – a space dedicated to creativity, where you control the environment to suit your workflow. Careful planning of your pottery studio space is a crucial step in the pottery-making process, from deciding between hand-building and wheel throwing techniques to considering whether glazing will take place in the studio.
Essential Tools and Equipment
Comparable to how a painter requires brushes or a musician necessitates an instrument, you, as a potter, need specific tools to give life to your clay. The essential tools for a pottery studio include:
A potter’s wheel
Clay
A kiln for firing
Hand tools for detailing
Glazes
These tools are the lifeblood of your pottery studio.
Potter’s wheels come in several brands, each catering to different skill levels. For beginners, budget-friendly options are available around the $500 price range.
Essential tools for pottery making include:
a cutting wire
a wooden rib
a sponge
a trimming tool
a needle tool
a clay scraper
These tools will help you shape and add details to your pottery.
Preparing the Workspace
Getting your workspace ready could be compared to arranging the stage prior to a performance. A well-planned workspace can significantly enhance your pottery-making experience. Considerations such as ample room, flat working surfaces, and good ventilation are key.
Cover your work table with heavy canvas to create a non-stick surface suitable for pottery. Organizing storage shelves for your pottery pieces and tools, and utilizing a mobile cart or shelf for storing bats and tools can promote practicality and workflow efficiency. Don’t forget, a well-lit workspace is essential as pottery making requires attention to detail and can cause eye strain in poor lighting.
The Process of Wedging Clay
Wedging wet clay is similar to kneading dough prior to baking bread. It’s a critical step in the pottery-making process that ensures the removal of air bubbles and preps the clay for shaping.
There are various techniques to wedge clay, including the ox-head method, wire wedging, and stack and slam wedging. To use the ox-head method, you should press down on either side of the clay with both hands and move it forward and upward in a circular motion on a flat surface. This technique helps to homogenize the clay and remove air bubbles..
It’s recommended to wedge clay for around 5 minutes to achieve a homogenous and air-free consistency – a perfect canvas to start shaping your pottery.
Shaping Your Vision: Hand-Building and Wheel Techniques
With the clay prepared, you can now unleash your creativity to mold your pottery. The two main techniques for shaping pottery are hand-building and wheel techniques. Hand-building, an ancient pottery technique, predates the pottery wheel and includes methods such as pinching, coiling, and using flat rolled out slabs of clay.
Meanwhile, the pottery wheel facilitates the creation of pieces with radial symmetry, making pottery wheels essential tools for ceramic artists.
Hand-Building Methods
Hand-building methods are all about feeling the clay in your hands and shaping it using your fingertips. The most basic technique is creating a pinch pot, where you pinch the clay between your fingers to shape it.
Slab pots can be made by using a slab roller to roll clay flat, cutting it into desired shapes, and then joining the pieces using a score and slip method. If you don’t have a slab roller, you can use a rolling pin and two canvas sheets as an alternative to achieve flat slabs of consistent thickness for slab construction.
Coiling involves rolling clay into long strands, then layering and joining them to create vessels or forms.
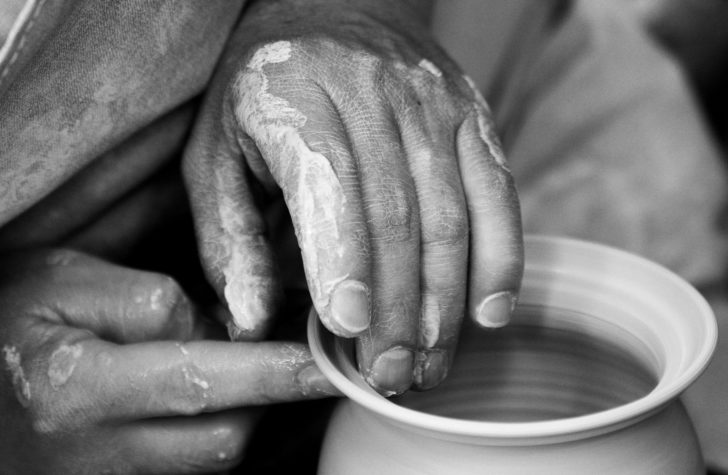
Mastering the Potter’s Wheel
Getting proficient with the potter’s wheel might resemble the process of learning how to drive. It requires practice, but once you get the hang of it, you can create beautiful symmetrical pottery with ease.
The first step in using a pottery wheel is to weigh out and shape the clay into a symmetrical ball. Throwing pottery on the wheel involves shaping clay while it spins, requiring the potter to center and shape it into the desired form.
Making a hole in the center of the clay on the wheel is a crucial step to begin shaping the piece.
Drying Your Creation: Managing the Drying Process
Following the extensive shaping and molding, your pottery is now ready to dry. Managing the drying process is critical in pottery making to prevent cracks and warping.
A good drying environment can be achieved by storing pottery in a damp room or using plastic to cover the pieces. This keeps the clay’s moisture level even and protects it from drafts that can cause uneven drying. Small details like handles, which dry faster than thicker parts, can be protected by wrapping them in plastic or wax resist.
Bisque Firing Explained
Bisque firing equates to the adolescence of pottery – a transformative phase that solidifies the clay and readies it for glazing. During this process, pottery pieces are bisque fired, placed on a kiln shelf with a quarter-inch gap between them for side-by-side arrangement, ensuring consistent heat distribution.
Raise the bottom shelf of the kiln one inch above the kiln surface and keep a one-inch space between ceramics and the kiln’s walls to facilitate proper air circulation during bisque firing. At the onset of bisque firing, allow a small gap between the kiln lid and body to release moisture and gases, gradually closing the lid to prevent thermal shock as the temperature inside the kiln rises.
Decorating with Glazes and Oxides
Applying glazes and oxides for decoration could be compared to the act of applying makeup. It adds color, texture, or functionality to pottery, becoming a hard, glassy surface on the clay that enhances aesthetic and functional properties.
Understanding Glaze Chemistry
As cooking demands a clear comprehension of ingredients and their interactions, so too does glazing necessitate a fundamental understanding of glaze chemistry. Glaze chemistry involves understanding the function of each oxide in a fired glaze and the balance between them.
Each oxide in a glaze has a specific role, categorized as:
Fluxes: These help to lower the melting point of the glaze and promote the flow of the glaze during firing.
Stabilizers: These help to control the expansion and contraction of the glaze during firing, reducing the likelihood of cracking or crazing.
Glass formers: These are responsible for creating the glassy surface of the glaze.
Understanding glaze chemistry is key for addressing common glaze problems like crazing, blistering, and leaching, allowing for more precise troubleshooting.
Applying Glazes
The application of glazes, a critical stage in the pottery-making process, can notably amplify the aesthetics of the final product. It’s important to stir the glaze well before application and to use a fine sieve when working with powdered glaze materials to prevent inhalation of dust.
Pottery glazes can be applied to pieces using various methods, including:
Brushing
Dipping
Spraying
Pouring (specifically recommended for larger works)
After glaze application, any glaze on the base of the pot should be promptly removed before further decoration or handling.
The Final Transformation: Glaze Firing
The concluding phase in pottery making, glaze firing, mirrors the final act in a theatrical play. It’s the climax where the pottery glaze melts and forms a glassy coating, transforming a glazed pottery piece into its finished form.
Glaze firings can reach up to 1300 degrees Celsius or 2372 degrees Fahrenheit, and the gradual heating and cooling process is crucial for the glaze to properly mature on the pottery piece. Today, electric and gas kilns, including the electric kiln, enhance the glaze firing process by allowing for automated control of the firing schedule, leading to more consistent and precise results.
Displaying and Using Your Finished Pottery
Following the intense labor and patience, the moment has arrived to display your masterpiece. Handmade pottery should be cleaned with a soft sponge or cloth in warm soapy water to maintain the quality and prevent damage to the glazing.
If you intend to use your pottery for food, here are some guidelines to follow:
Ensure the glazed area is for food placement
Avoid extreme temperatures to prevent thermal shock
If food contacts non-glazed parts, the pottery should be pasteurized by boiling it in water for 15 minutes
Allow the pottery to dry completely to ensure hygiene
Learn more, check out Mastering the Art of Pottery Craft Ceramics.
Summary
We’ve walked through the fascinating process of pottery making, from choosing the right clay and setting up your workspace, to shaping, drying, and firing your creation. Whether you’re a beginner or a seasoned potter, we hope this guide has enriched your understanding and inspired you to create extraordinary pottery. Remember, the journey of pottery making is as beautiful as the final product. So, embrace the process, learn from each step, and let your hands create magic!
Frequently Asked Questions
What are the different types of pottery clays?
There are three main types of pottery clays: earthenware, stoneware, and porcelain, each with its own unique composition and characteristics. Choose the one that best suits your project!
What are some of the essential tools for pottery making?
The essential tools for pottery making include a potter’s wheel, clay, a kiln for firing, hand tools for detailing, and glazes. Happy potting!
What is bisque firing?
Bisque firing is a crucial stage in pottery making that strengthens the clay and readies it for glazing.
How do I apply glazes to my pottery?
To apply glaze to your pottery, you can use brushing, dipping, or spraying methods. Don’t forget to stir the glaze thoroughly before applying it.
How do I care for my finished pottery?
To care for your finished pottery, use a soft sponge or cloth with warm soapy water for cleaning. Also, ensure the glazed area is for food placement if used for food, and avoid extreme temperatures to prevent thermal shock.


