Looking to learn how to make a robot? This beginner’s guide will walk you through the entire process. You’ll learn about the tools, materials, assembly, and programming needed to build your first “how to make robot” project.
Table of Contents
Key Takeaways
Start with a simple robot kit, like the UBTECH UKIT Beginner, to build foundational skills in robotics.
Gather essential tools and materials, such as pliers, soldering iron, and an Arduino board, to ensure a smooth robot-building process.
Choose a beginner-friendly robot kit, such as mBot, Arduino Starter Kit, or LEGO Mindstorms EV3, to get clear instructions and appropriate challenges for your skill level.
Getting Started with Your First Robot
Starting your first robot project can seem daunting, but it all begins with the right motivation. Keeping your motivation up helps to tackle the challenges that will come your way. Remember the KISS principle: Keep It Simple, Stupid. Begin with a straightforward design to avoid overwhelming yourself. A simple robot kit like the UBTECH UKIT Beginner is a great choice, especially for younger builders, as it’s designed to develop fundamental skills in computational thinking and problem-solving.
Another vital step involves planning. Sketch your robot’s design on paper or a computer before you start assembling. This helps save time and money and ensures a well-constructed robot. Also, choose a project that matches your skill level. There are numerous online tutorials, like those on the Society of Robots site, that can guide you through the process.
Robot building can greatly enhance your skills in electronics, programming, and mechanical engineering. Whether you’re a complete beginner or have some experience, starting with a simple project can set a solid foundation for more complex creations in the future. So, gather your tools, pick a design, and get ready to build a robot!
Essential Tools and Materials for Building Robots
Prior to starting your robot construction, ensure you’ve gathered the necessary tools and materials. You’ll need:
Needle nose pliers: perfect for twisting and bending components and pulling wires from tight spaces
Hobby knife: for precise cutting tasks
Wire cutters and strippers: for handling wires
Screwdriver set with magnetized ends: useful for fastening screws in electronic devices
Safety is paramount, so don’t forget your safety goggles to protect your eyes from hazards like soldering smoke and flying debris. Some essential tools for soldering electronic components on a circuit board include:
Soldering iron
Adhesive tapes, especially double-sided foam tape, for quickly attaching components together
Zip ties for keeping your work area organized and preventing potential hazards.
Starting your build requires various components, like:
battery packs
servos
wheels
an Arduino board
A digital multimeter is crucial for measuring voltage, current, and resistance, making it indispensable for troubleshooting circuits. With these tools and materials at hand, you’ll be well-equipped to start your robotics journey.
Choosing the Right Robot Kit
Your robotics adventure involves a critical step, which is selecting the appropriate robot kit. For beginners, it’s best to choose kits that come with clear and concise instructions and visual guides. Age-appropriate kits ensure that the challenges and skills are suitable for different age groups. For instance, the VEX Robotics Design System is ideal for kids aged 4-14, focusing on mechanics and engineering.
Some popular beginner-friendly kits include:
mBot: great for STEM education
Arduino Starter Kit: helps beginners learn about electronics and programming
LEGO Mindstorms EV3: includes sensors, motors, and a programmable brick with lego bricks
These kits often come with online tutorials and support, making the learning process smoother.
When choosing a robot kit, consider the following factors:
Compatibility with your computer or device
Compatibility with your preferred programming language
Availability of expansion packs or add-ons for future growth
Whether the kit is based on open-source platforms
By considering these factors, you can find the right robot kit that will provide a solid foundation for building and programming your own robots.
Assembling Structural Parts
Having acquired your robot kit, you can now begin assembling the structural components. Using lightweight, rigid materials like aluminum or HDPE for your robot’s frame is ideal. These materials ensure that your robot is sturdy yet easy to move. If you’re looking to save time, consider hacking a toy RC car for its chassis, which provides a professionally built base for your robot.
To minimize mistake risks and simplify the assembly process, it’s advisable to use fewer and simpler parts. Mounting each component effectively depends on its placement, weight, size, and function. For example, mounting a servo to the chassis typically involves using small supplied plastic components that come with the servo. By carefully planning and assembling the structural parts, you’ll lay a strong foundation for your robot’s functionality. As you assemble, ensure that all components are properly secured and aligned.
Installing Motors and Wheels
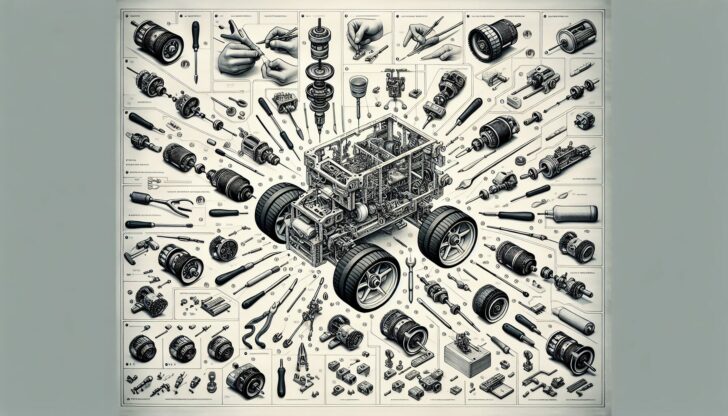
To breathe life into your robot, a vital step is installing the motors and wheels. There are several methods you can use to attach the wheels:
Direct mount method: This is the cheapest and easiest way to attach wheels. It is best suited for light-duty payloads or heavy-duty motors, as the motor shaft takes all the weight.
Single bearing method: This method uses a ball bearing to take most of the load off the motor shaft. It provides a more robust solution compared to the direct mount method.
Dual bearing system: This method offers the most durability by using two bearings and chain driving the wheel. It provides the highest level of stability and strength.
Choose the method that best suits your robot’s needs and requirements.
The wheel diameter choice is vital because it influences the motor’s torque and velocity. Larger wheels provide higher velocity but lower torque, so balance is key based on your robot’s intended tasks. For a typical motor setup, you’ll need components like a motor mount plate, ball bearing, screws, and a pneumatic tire, depending on the motor type (e.g., IG32 or IG42).
For a 2WD robot, follow these step-by-step instructions:
Mount the motor to the motor plate.
Attach the motor plate to the motor tube.
Secure the wheel to the shaft.
Attach the shaft to the motor shaft using shaft collars and bearings.
By following these instructions, you’ll ensure that your robot can move efficiently and reliably, especially when it needs to turn left.
Wiring and Connecting Electronics
Once the structural parts and motors are in place, you can proceed to wire and connect the electronics. For the performance and safety of your robot, correct wiring is paramount. Place electronic components higher up on the robot to avoid interference from motors and protect them from dirt. Ensure all wires are connected with the correct polarity before plugging in the battery, with red wires to positive terminals and black wires to negative terminals.
Organize your wiring using the following techniques:
Use zip ties to keep everything neat and prevent potential hazards
Use Wago connectors for secure connections to the Power Distribution Hub and motor controllers
Insulate power connections with electrical tape to prevent short circuits
By carefully wiring and connecting the electronics, you’ll ensure your robot’s circuits and devices function correctly and safely.
Programming Your Robot’s Brain
The magic happens when you program your robot’s brain. Scratch, a drag-and-drop, block-based programming language developed at MIT Media Lab, is perfect for beginners. It’s accessible both online and offline through its desktop editor. Many beginner robots, like the mBot Mega and LEGO Spike Prime, use Scratch for programming.
Starting with Scratch allows you to:
Visualize the programming logic without getting bogged down in complex syntax
Learn coding concepts in a fun and engaging way
Bring your robot to life by making it move, sense its environment, or interact with its surroundings
Write and test your code easily
The Scratch environment provides the perfect platform for all of this.
As you gain confidence in programming, you can explore more advanced languages and environments. But for now, Scratch offers a solid foundation to begin programming your robot’s brain and seeing your creations come to life.
Testing and Troubleshooting
To guarantee the correct operation of your robot, testing and troubleshooting are vital steps. For safety, place the robot on blocks to keep the wheels off the ground before turning on the power to prevent unexpected movements. Monitor the robot’s motion and regularly inspect its harness, cables, and structure to prevent failures.
Verify the accuracy of any sensors or vision systems used by your robot to ensure precise operation. Conduct software updates or firmware upgrades for the robot controller to keep it running optimally. By following these steps, you’ll be able to identify and solve issues, ensuring your robot performs reliably and safely.
Enhancing Your Robot with Sensors and Additional Features
Equipping your robot with sensors and additional features can greatly broaden its capabilities. For example, the mBot Mega offers omnidirectional remote control, multiple sensors, and a powerful MegaPi controller, while the DJI RoboMaster S1 includes an HD camera, infrared sensors, and a gyroscope. Adding sensors like vision sensors, LIDAR, and gyroscopes can help your robot navigate and interact with its environment more effectively.
Exteroceptive sensors, such as cameras and ultrasonic sensors, provide information about the robot’s surroundings by capturing visual data and measuring distances. Proprioceptive sensors, like accelerometers and gyroscopes, provide internal state information, helping with stabilization and guidance.
When installing sensors, mount them away from motors to avoid electronic noise and place them strategically to minimize damage from collisions. With the right sensors and additional features, your robot can tackle more complex tasks and operate more autonomously.
Fun Projects to Try with Your Robot
With your own robot now built and programmed, you can indulge in some exciting projects for fun. Start with a Line Following Robot, which uses sensors to follow a line drawn on the floor. Another great project is an Obstacle Avoidance Robot that utilizes sensors to detect and avoid obstacles in its path.
For a creative twist, make a Drawing Robot that can draw patterns or shapes using a mounted pen. You can also build a DIY Remote Control Robot that can be controlled using an IR remote, similar to a TV remote. These projects will not only expand your skills but also ignite your creativity and imagination, making the learning process enjoyable.
Check out How to Build a Robot at Home (with Pictures).
Summary
Building your own robot is an incredible journey that combines creativity, problem-solving, and technical skills. From selecting the right robot kit to assembling the parts, installing motors and wheels, wiring the electronics, and programming the robot’s brain, each step brings you closer to creating a functional robot.
Enhancing your robot with sensors and additional features opens up a world of possibilities, allowing your robot to perform more complex tasks and interact with its environment. Fun projects like line-following robots and drawing robots keep the learning process engaging and enjoyable.
As you continue exploring and building your own robots, remember that each project is an opportunity to learn and grow. The skills you’ve acquired will not only help you in robotics but also in other areas of science, technology, engineering, and mathematics. Keep experimenting, stay curious, and let your creativity lead the way.
Frequently Asked Questions
What is the best robot kit for beginners?
The best robot kit for beginners are the mBot and Arduino Starter Kit, as they come with clear instructions and are age-appropriate. Try one of these to get started with building your own robot!
What tools do I need to build a robot?
You need needle nose pliers, a hobby knife, wire cutters, a screwdriver set, safety goggles, a soldering iron, and basic components like battery packs and wheels to build a robot. Gather these tools before starting your project.
How do I start programming my robot?
You can begin programming your robot by using a beginner-friendly language like Scratch, which utilizes drag-and-drop blocks. This can be done with beginner robots such as the mBot Mega.
What are some fun projects I can try with my robot?
You can try building a line-following robot, an obstacle avoidance robot, a drawing robot, and a remote control robot for some fun and skill-building projects with your robot. Enjoy experimenting and being creative!
How do I troubleshoot my robot?
To troubleshoot your robot, begin by safely placing it on blocks to elevate the wheels. Then, check its motion, inspect cables and sensors, and perform any necessary software or firmware updates.


 – A Simple Guide")

